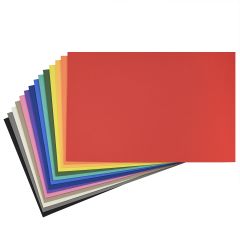
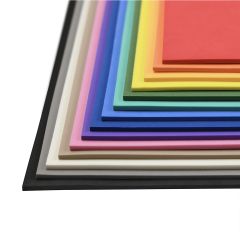
3d Foam
Understanding 3D Puffy Foam Embroidery
3D puffy foam embroidery is an innovative technique that enhances the visual and tactile dimensions of embroidered designs. By incorporating foam into the embroidery process, stitches are raised above the fabric, creating a striking three-dimensional effect. This method not only adds depth but also brings a unique texture to garments.
- How It Works
Foam Placement: Begin by placing a piece of foam on the fabric where your design will go. The foam acts as a foundational layer that lifts the stitches. - Stitching Over Foam: Next, embroider your design over the foam. As the needle moves through the foam, it secures the material to the fabric and forms a raised pattern. This process requires careful digitizing to ensure that the stitches are dense enough to hold the foam securely in place.
- Removing Excess Foam: Once the embroidery is complete, gently remove any excess foam. This can be done manually, as the stitches will have perforated the foam, making it easy to tear away the parts outside the design area.
Benefits and Creativity
Incorporating 3D foam into your embroidery projects offers vast creative possibilities. It’s a fantastic way to add dimension and interest to designs, whether they be logos, text, or intricate patterns. This technique can transform a simple piece into a standout item, making it particularly popular in fashion and promotional merchandise.
By experimenting with different foam thicknesses and colors, you can achieve varied effects, tailoring each project to suit your creative vision.
Steps to Embroider with 3D Puffy Foam
Embroidering with 3D puffy foam adds a dynamic and textured dimension to your projects. Here's how to achieve that professional finish:
- Begin with Regular Embroidery
Start by completing all standard embroidered sections of your design. This initial step ensures that all elements are in place before adding the foam for a smooth transition. - Pause for Foam Application
Once you finish the standard embroidery colors, pause the machine. At this stage, your design file or color chart will indicate a color change with the label “foam.” This is your cue to get ready for the next unique step of the process. - Position the Foam
Lay the foam onto the fabric within the designated areas of your design. It's crucial to utilize foam that matches your thread color to achieve a seamless look. This harmony enhances the design's depth and texture. - Apply Tack-Down Stitches
With the foam in place, the machine will apply tack-down stitches. These stitches are essential to securing the foam to your base fabric, preventing any movement during the ongoing embroidery process. - Complete the Foam Embroidery
Continue the embroidery process. The machine will now sew the areas intended for foam, creating that wonderful 3D effect as the thread encapsulates the foam. - Remove Excess Foam
Carefully remove any surplus foam by gently tearing it away. Properly digitized designs will allow the extra foam to release with ease, leaving behind clean and crisp edges. - Enjoy the Finished Product
Admire your completed design, now brought to life with striking 3D effects. Your project not only stands out in dimension but also in craftsmanship.
These steps will guide you through creating vibrant and tactile embroidered designs using 3D puffy foam, ensuring your creations leave a lasting impression.
Understanding the Differences: 3D Foam Embroidery vs. Regular Embroidery Digitizing
Digitizing for 3D puff foam embroidery isn't just a simple extension of regular embroidery. It introduces additional complexities due to the incorporation of foam to achieve striking 3D effects. Here’s a breakdown of how these two approaches differ:
- Elements Involved
Regular Embroidery typically involves just fabric and thread. The process focuses on translating a flat design into stitches.
3D Foam Embroidery adds a new dimension with foam, requiring extra consideration in the digitizing process to ensure the end result achieves the desired raised effect. - Design Considerations
With regular embroidery, the design revolves around the texture and color of the fabric along with the choice of thread.
For 3D foam embroidery, you need to plan how the foam will be used to enhance specific parts of the design. This often means adjusting the stitch density and angles to avoid compressing the foam, which can detract from the 3D effect. - Technical Challenges
Regular embroidery offers a more straightforward path, demanding precision mainly in thread tension and fabric interaction.
3D foam embroidery introduces several additional challenges. Factors such as thread tension, angle, and density become critical. The digitizer must ensure that the foam remains intact and provides the intended lift without collapsing or distorting. - Complexity and Skill Level
Digitizing regular embroidery can be challenging but generally follows a predictable pattern once the basic rules are understood.
3D foam embroidery, however, poses a significant learning curve. It demands a deeper understanding of the materials and techniques to strike the right balance between aesthetics and functionality. The result is often stunningly unique but can be difficult to master.
In summary, while 3D foam embroidery can achieve eye-catching three-dimensional effects desirable for caps and other garments, it requires meticulous planning and expertise in digitizing techniques to harness the true potential of foam as a medium.
Adding Flair to Your Embroidery Projects with 3D Puffy Foam
Looking to elevate your embroidery projects to eye-catching new heights? 3D puffy foam embroidery might just be what you need to make your designs truly stand out. This technique enhances embroidery by creating a raised, textural effect that adds depth and interest.
What is 3D Puffy Foam Embroidery?
Puffy foam embroidery involves using foam material beneath your stitches to create a three-dimensional effect. By strategically embroidering over the foam, sections of your design are lifted, giving them a bold and dynamic appearance. This innovative method brings your creations to life, offering a tactile experience that flat embroidery sometimes lacks.
Why Choose 3D Puffy Foam?
- Visual Impact: Transform flat designs into dynamic pieces that catch the eye instantly.
- Unique Texture: Add a new layer of texture that draws attention and feels intriguing to the touch.
- Versatility: Suitable for a wide range of items, from hats and jackets to tote bags, expanding creative possibilities.
- Enhanced Creativity: Encourages experimentation with different designs, pushing the boundaries of traditional embroidery.
How Does It Enhance Your Embroidery?
- Dimensional Depth: The foam raises segments of your design, giving them depth and making your work pop out, literally and figuratively.
- Personalization: Perfect for logos, names, or any design where you want to emphasize certain elements.
- Professional Finish: Achieve a polished and professional appearance that can impress clients, friends, and family alike.
By adding 3D puffy foam embroidery to your repertoire, you gain a powerful tool for making your projects more engaging and memorable.
Tips for Achieving Eye-Pleasing Results with 3D Foam Embroidery
Embarking on a 3D foam embroidery project can be both exciting and challenging. Here are some key tips to help you achieve stunning, eye-pleasing results:
- Source Quality Foam: Your first priority should be finding a reliable supplier of high-quality foam that stitches well. Sourcing foam in bulk from craft outlets or specialized retailers can save you money and ensure you always have a good supply.
- Design Evaluation and Troubleshooting: Before digitizing, take a close look at your design. Pay special attention to large, columned shapes and text, as these work best with foam embroidery. Address any potential issues in the artwork ahead of time to avoid disruptions later.
- Set Realistic Expectations: When working with clients, clearly communicate what aspects of the design can utilize foam and which should stick to standard stitching. This ensures the final product aligns with both your and your client's vision.
- Refine Through Practice: Mastery comes with experience. Be prepared to digitize and edit your designs multiple times. This iterative process is essential for refining your skills, though it may require an extra dose of patience.
- Factor in Additional Costs: Due to the additional time and effort involved in foam digitizing, consider adjusting your pricing. Charging appropriately for the increased complexity and time commitment is crucial for sustaining your craft.
By meticulously sourcing materials and honing your design process, you can create visually dynamic and professional-looking 3D foam embroidery.
Frequently Asked Questions
- Is 3D Puffy Foam washable?
Yes, when properly stitched, 3D Puffy Foam can withstand regular washing and dry cleaning. Be sure to follow garment care instructions and use appropriate thread density to secure the foam. - Can i use craft foam or eva foam sheets instead?
Use foam specifically made for machine embroidery for the best results—especially for commercial or client work. Embroidery foram has a consistent texture and ensures color is not faded after washing, with regular craft foam you are risking quick color and shaqe degradation
Can Eva Craft Foam Be Used Instead Of Embroidery Foam?
Technically, you should not use EVA craft foam sheets as a substitute for embroidery foam (3D Puffy Foam), there are important considerations before doing so:
⚠️ Considerations and Drawbacks:
Density and Flexibility:
EVA foam is often denser and less compressible than embroidery foam, which can cause:
- Needle breaks
- Poor stitch penetration
- Thread shredding
Melting Point:
EVA foam has a lower melting point, so:
- It may melt or deform under the heat of the embroidery needle or during ironing.
- It might release fumes if accidentally heated too much.
Cleanup:
Embroidery foam is designed to tear cleanly or dissolve where not stitched. EVA foam may:
- Leave visible edges or fragments
- Be harder to trim cleanly
Color Fastness:
EVA craft foam may bleed color or degrade faster after washing, while embroidery foam is made to be durable and color-safe.
✅ Best Practice:
Use foam specifically made for machine embroidery for the best results—especially for commercial or client work.


